Editorial / Poster
Halftone Architectural Collage Poster
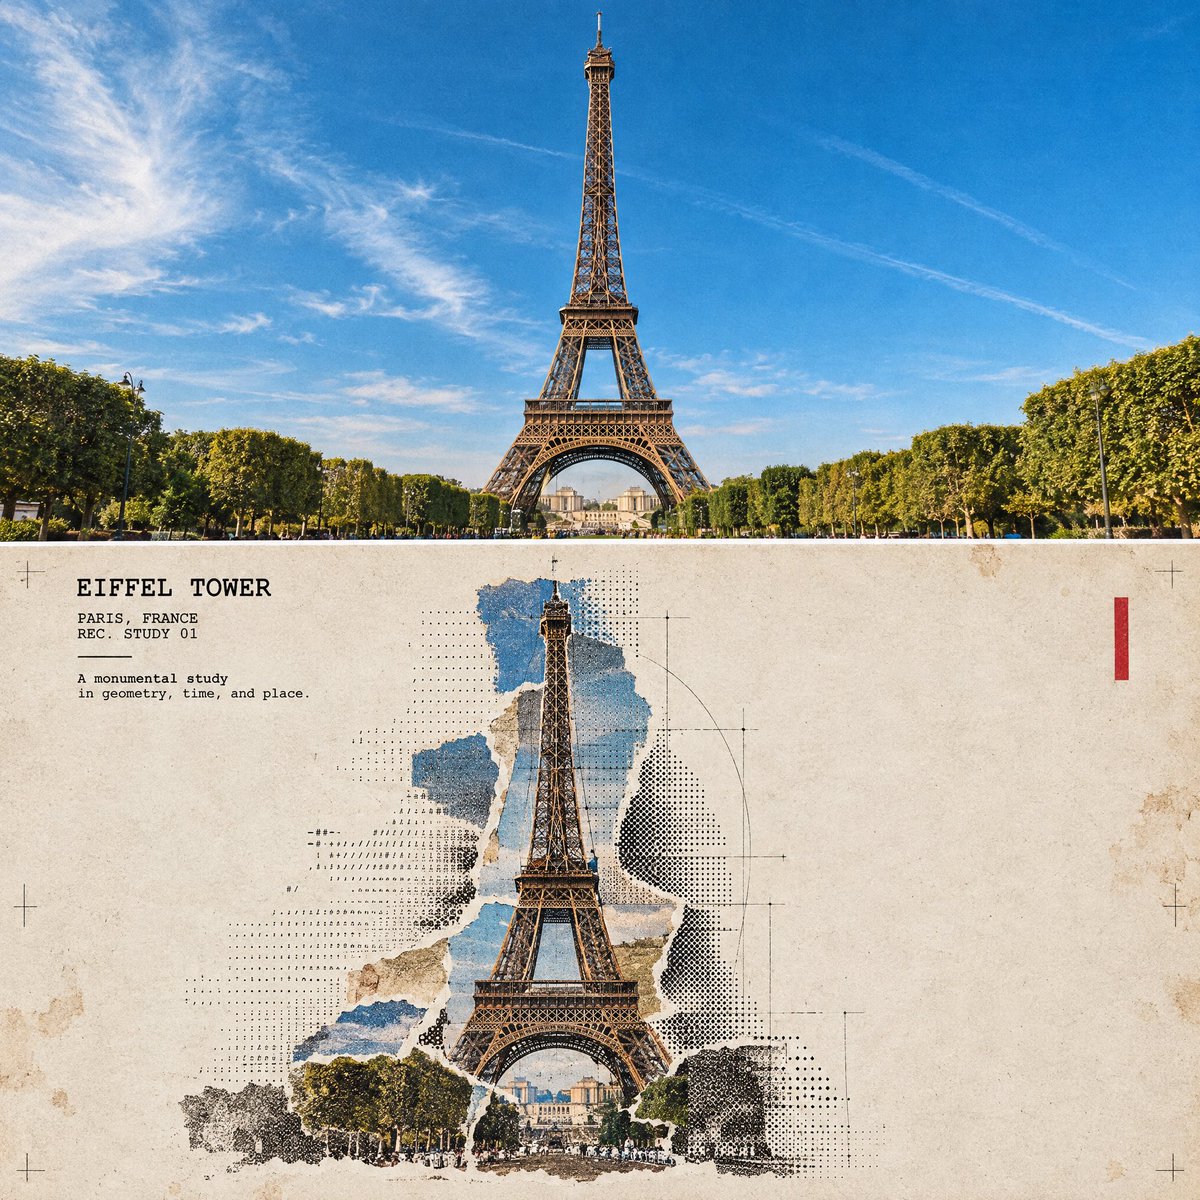
Turn this structure photo into a single high-end halftone architectural travel-collage poster. Output one poster per uploaded photo — never merge multiple structures or photos into one frame. FORMAT 3:4 vertical canvas.
Full prompt
Turn this structure photo into a single high-end halftone architectural travel-collage poster. Output one poster per uploaded photo — never merge multiple structures or photos into one frame.
FORMAT
3:4 vertical canvas. Split into two roughly equal zones — real architectural photo on top, printed reconstruction below — divided by one clean, sharp horizontal line.
Do not stretch, warp, tilt, or unnaturally reposition the structure to force the proportions.
TOP HALF — THE REAL SHOT
Preserve the original structure faithfully: same architecture, proportions, perspective, distinctive details, surrounding elements, natural light and shadow, and original color mood.
Keep recognizable features such as:
* façade
* windows and arches
* towers or domes
* doors and structural details
* roofline
* surrounding landscape or street elements
Add only a subtle high-end color grade and the faintest film grain. Do not redesign or reinterpret the architecture.
BOTTOM HALF — THE PRINTED RECONSTRUCTION
Rebuild the same structure as an experimental printed architectural collage using:
torn photographic fragments + fixed-width ASCII character fields + photocopy halftone dots + architectural linework.
The structure must remain immediately recognizable.
* Torn-edge photographic fragments preserve the most important architectural details.
* Brick, stone, glass, metal, shadows, windows, and surrounding textures gradually dissolve outward into ASCII characters, black halftone dots, fragmented print grain, and fine architectural drafting lines.
* Use thin technical construction lines to subtly trace the structure’s geometry.
* Let selected areas break apart into paper fibers and halftone fragments, creating the feeling that the building is emerging from an archival print.
* Keep the main silhouette strong and readable.
* Texture: rough white paper-fiber edges, subtle photocopy imperfections, slight print misregistration, faded ink, old-paper stains, a few restrained crop marks, and one small red calibration bar.
* Color: warm gray old-paper background + black ink + the structure’s original muted colors + a single restrained red accent.
* Never fully desaturate the structure.
The structure should occupy roughly 60–88% of the frame width, scaled according to what reads best for the architecture.
Leave 22–38% of the paper visibly untouched and empty, creating generous negative space so the poster feels like an archival architectural specimen rather than a packed digital screen.
TYPOGRAPHY
Add one clean, readable fixed-width architectural title based on the structure:
[STRUCTURE NAME]
Below it include:
[CITY, COUNTRY]
REC. STUDY 01
Add one short observational caption related to the architecture, such as:
“A monumental study in geometry, time, and place.”
Typography should feel like an old architectural archive mixed with an underground experimental design journal.
A few loose ASCII glyphs may trace the outer silhouette or architectura